
The Power Denture Protocol for predictable Aesthetics
Gets Aesthetics Right the FIRST Time
Starts with a cosmetic simulation
Builds patient confidence
Increases patient satisfaction
Reduces chair time & office visits
Protocol for creating a Power Denture
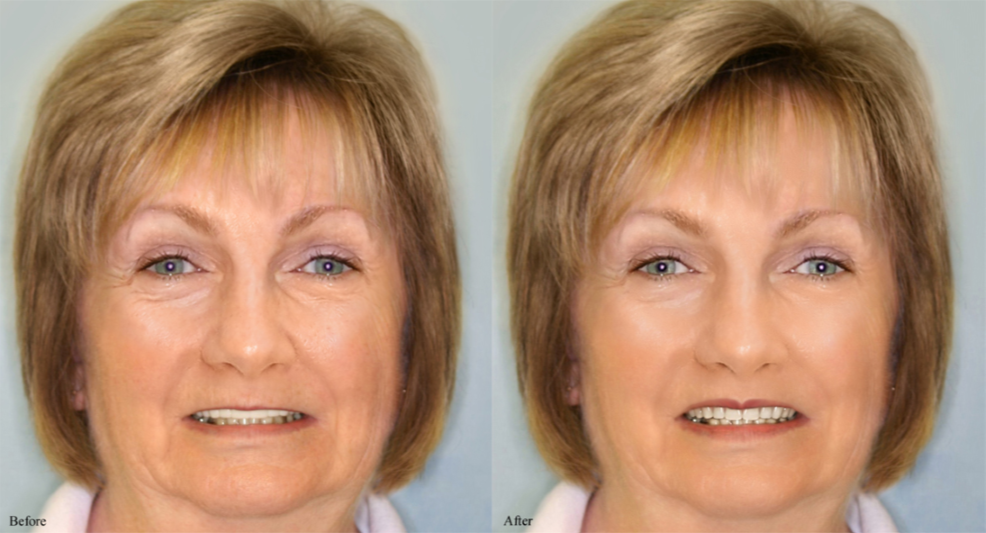
1. Take a full-face high-resolution digital photo of the patient with a natural unforced smile as seen above. Upload the image to your Smile-Vision imaging site. Either natural teeth or prosthetic anterior teeth must be showing in the photo. Patients should be looking directly into the camera. Ask patients to bite on cotton rolls in the molar regions when taking the photo whenever vertical dimension is to be opened in the subsequent case.
2. Get patient approval of the simulation or have it redrawn until all involved in the case are satisfied.
3. Whenever a patient has natural maxillary anterior teeth showing in the “before” image, take a border-molded impression of the arch. Send to Smile-Vision with a counter model and bite for construction of an aestheically enhanced prosthesis.
4. Whenever a patient is wearing a removable appliance, duplicate it and reline the duplicate with impression material. Send to Smile-Vision with a counter model and bite for construction of a milled trial prosthesis.
5. Gain acceptance for the aesthetics of the trial prosthesis from the patient and proceed to the final prosthesis with a resilient frame and custom teeth for implant-supported cases.